1 Introduction
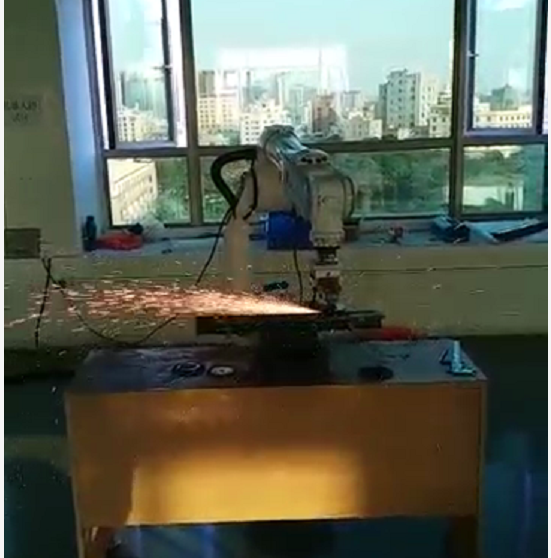
This chapter mainly describes the polishing process of this control system. INEXBOT pioneered the dedicated edge weld-point polishing instruction, requiring no complex programming.
It can automatically change grinding wheels for various polishing tasks, and the robot automatically polishes multiple times in different directions.
Polishing of welding spatter
Polishing of surface dents and scratches
Flattening of weld reinforcement
Flattening of machining allowance
Polishing of long and large weld seams
Removal of edges, corners and burrs
In combination with external-axis equipment such as positioners, large sheet metal parts can be polished, ensuring a smooth and even polishing result.
In combination with offline programming, compliant polishing of workpieces with complex curved surfaces can be achieved.
In combination with line-scan laser tracking technology, automatic polishing programming can be achieved:
2-point positioning line.
3-point/4-point positioning user coordinate system.
2 Polishing Parameters
Open the teach pendant, enter the "Process" screen, select "Polishing Process" to enter the "Polishing Parameters" screen. If you do not click Modify, only the process number can be modified. Select one of the process numbers and click the "Modify" button before it can be edited.
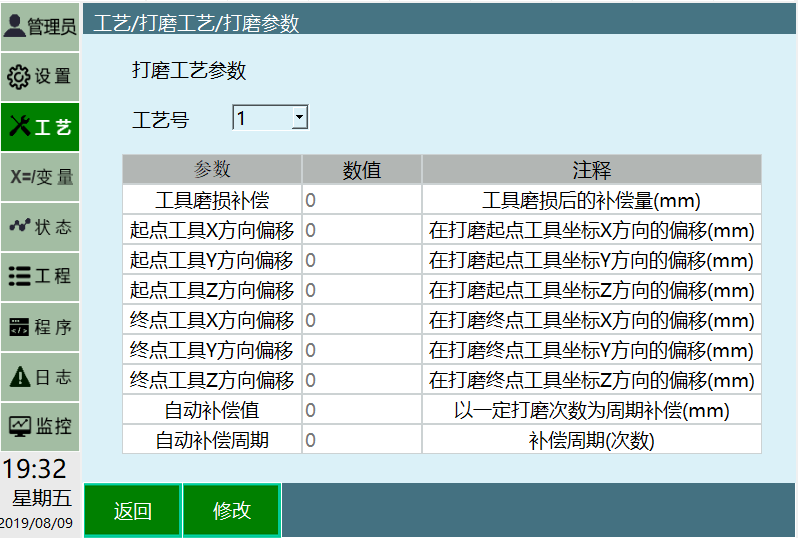
Process No.: Provides process numbers 1-9. Each process number saves all parameters under that process number.
Tool wear compensation: The value of polishing tool wear. After filling it in, this value is automatically compensated.
Start point tool X/Y/Z direction offset: Before polishing starts, the offset is automatically applied at the start point.
End point tool X/Y/Z direction offset: After polishing ends, the offset is automatically applied at the end point.
Automatic compensation period/automatic compensation value: After every set number of polishing passes, all parameters are automatically offset by a certain distance.
3 Polishing Instructions
3.1 POLISH_EDGE Edge Polishing Instruction
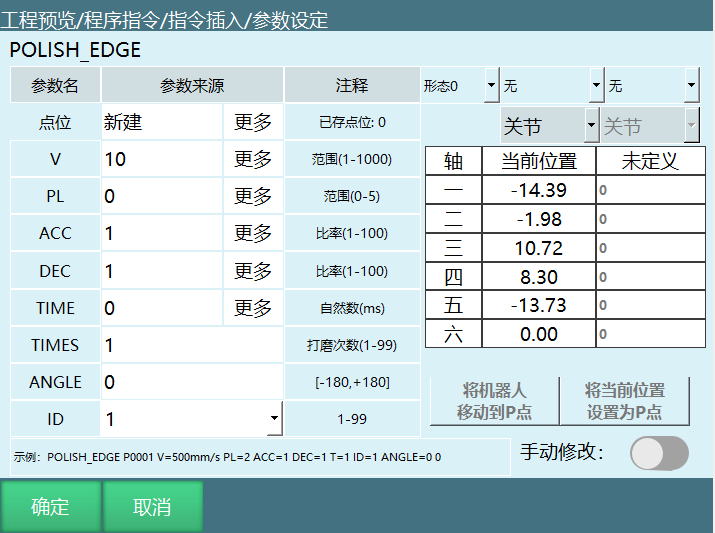
Currently, the polishing process only supports linear polishing. Compared with the MOVL instruction, POLISH_EDGE in the polishing process adds the ANGLE parameter, the TIMES polishing count parameter, and the ID process number parameter.
V: Linear motion speed, range 1-1000 (mm/s).
PL: Smoothness, range 0-5.
ACC: Acceleration adjustment ratio, range 1-100.
DEC: Deceleration adjustment ratio, range 1-100.
TIME: Advance execution time, natural number range 0-999999 ms.
ANGLE: Angle parameter. Sets the angle at which the tool polishes during polishing, range -180° to +180°.
TIMES: Polishing count parameter. The number of polishing passes required, range 1-99.
ID: Process number parameter. Selects the process number whose polishing parameters have been set in the polishing process, range 1-99.
3.2 POLISH_CONTINUE Continue Polishing Instruction
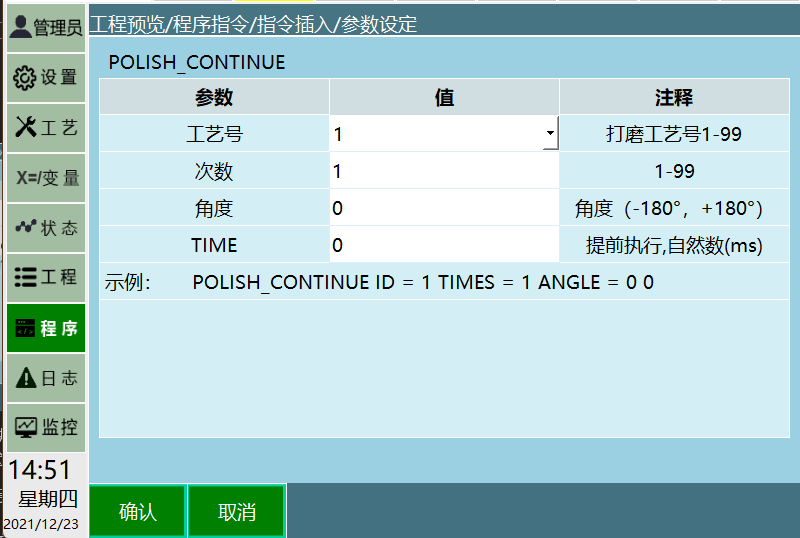
The continue-polishing instruction is mainly to make it convenient for operators to fill gaps. During polishing, some parts may not be polished well in the flow, so this function is added to make up for errors that may exist in some parts.
Process No.: Select the process number whose polishing parameters have been set in the polishing process.
Times: Polishing count parameter. The number of polishing passes required, range 1-99.
Angle: Sets the angle at which the tool polishes during polishing, range -180° to +180°.
TIME: Advance execution time, natural number range 0-999999 ms.
3.3 POLISH_OFF Polishing End Instruction
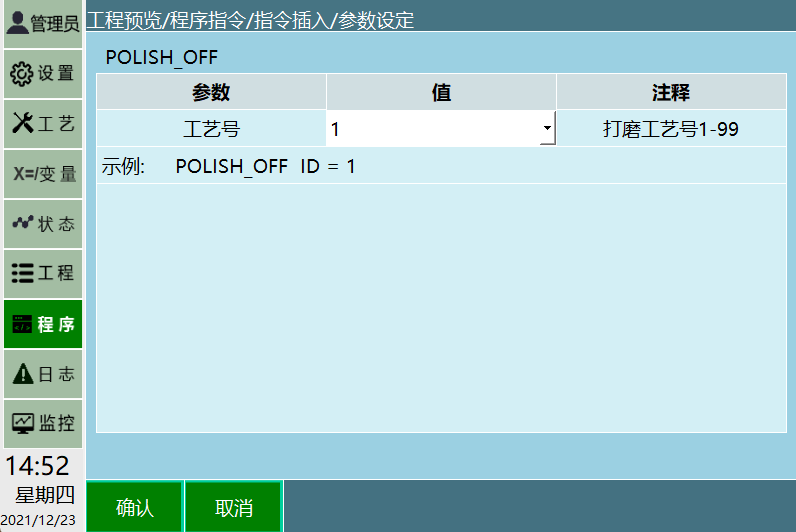
The end-polishing instruction ends the polishing process after execution.
Note: The overall flow needs to be used together with edge polishing. Before a polishing shift, safety protection and order data handover should be properly arranged. Sufficient consumables such as grinding discs, wire wheels, sandpaper and putty should be prepared, and the grinding tools should be checked for normal operation. Polishing workers must use the grinding tools correctly during polishing to ensure safe use.
4 Usage Scenarios
4.1 Scenario 1
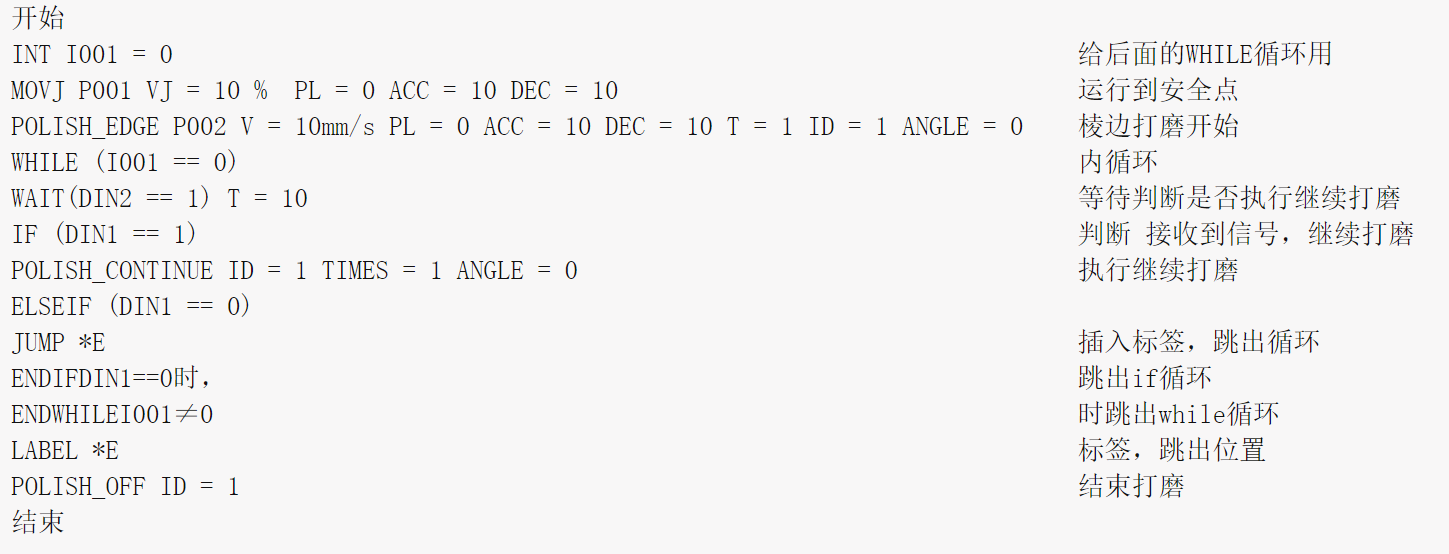
Polishing a straight line:
Polishing count 1, polishing angle 0 degrees (the angle of the current taught point); polishing starts;
After polishing, wait for the continue-polishing signal.
Template as follows:
4.2 Scenario 2
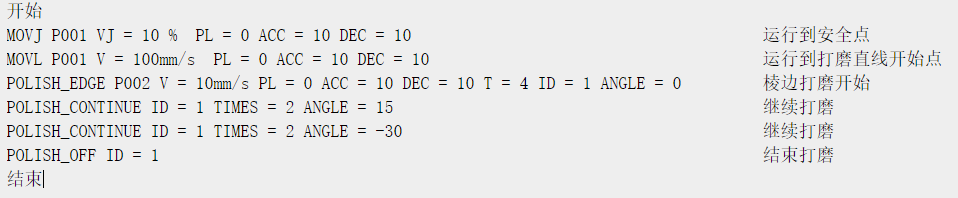
- Polishing a straight line: polish 4 passes at the taught position, 2 passes offset +15 degrees in the positive direction, and 2 passes offset -15 degrees in the negative direction.
Template as follows:
4.3 Scenario 3
The polishing head has worn 1 mm, and the parameters need to be adjusted.
Setup steps:
Enter Process/Polishing Process/Polishing Parameters, select the corresponding process number, and click Modify;
Fill in 1 for tool wear compensation and click Save;
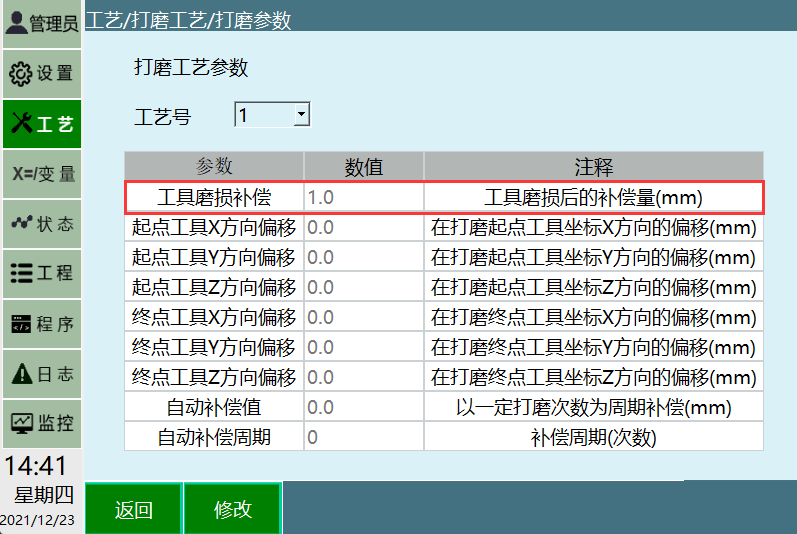
Setup is complete; just run the program.
4.4 Scenario 4
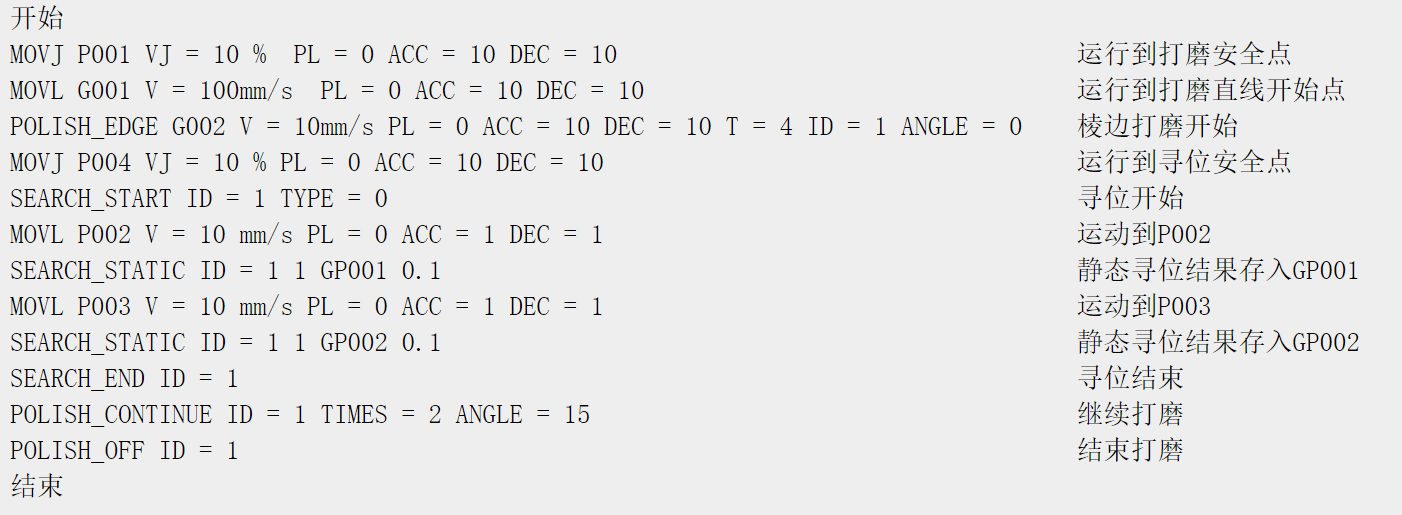
- Polishing a straight line: polish 4 passes at the taught position, offset +15 degrees in the positive direction, and polish 2 passes with laser position search.
Template as follows:
Q&A
Q: What polishing scenarios does the polishing process support?
A: It supports scenarios such as welding spatter polishing, surface dent and scratch polishing, weld reinforcement flattening, machining allowance flattening, long/large weld seam polishing, and edge, corner and burr removal. In combination with positioners, large sheet metal parts can be polished; in combination with offline programming, compliant polishing of workpieces with complex curved surfaces can be achieved.
Q: How many process numbers are provided in the polishing parameters?
A: 9 process numbers, 1-9, are provided. Each process number saves all parameters under that process number.
Q: How is tool wear compensated?
A: Enter Process/Polishing Process/Polishing Parameters, select the corresponding process number, click Modify, fill in the wear value in "Tool Wear Compensation", and click Save. The system will automatically compensate.
Q: What is the polishing angle range of the POLISH_EDGE instruction?
A: The angle parameter ANGLE ranges from -180° to +180°.
Q: What is the purpose of the POLISH_CONTINUE instruction?
A: The continue-polishing instruction is used to fill gaps and make up for errors that may exist in some parts of the polishing flow.
Q: Does the polishing process support polishing in non-linear directions?
A: Currently, the polishing process only supports linear polishing.
Q: What is the purpose of the automatic compensation period/automatic compensation value?
A: After every set number of polishing passes, all parameters are automatically offset by a certain distance, which is used to cope with gradual tool wear.