PC Simulation Software Tutorial
Notes
Supported by PC version after the requirement [#71620 Requirement: PC Teach Pendant Add Simulator Start Button] is merged.
Currently the communication between simulation software and controller is implemented. For example, when clicking [Unplug Teach Pendant] on PC, use the T30 teach pendant to plan the robot's motion trajectory, and the simulation software synchronizes the trajectory.
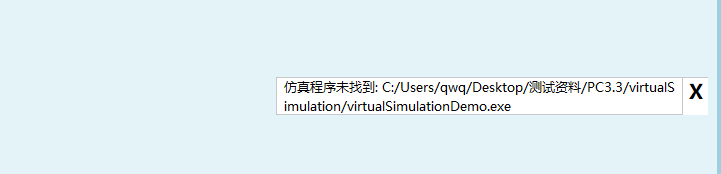
When clicking the [Simulation] button and the following message bar appears, it proves that the simulation software is placed in the wrong path.
- 3D models are generally in overall step format and need to be split into individual joint obj formats. You can use [CAD Assistant] software.
- To configure the config.json robot model coordinate values, you can use [Unity] software.
Preparation
Open the PC and ensure the robot's current state can be used normally.
Unzip the simulation software [virtualSimulation.zip] file and place it in the PC root directory, i.e., at the same level as the PC exe file.
Configure Model
Using INEXBOT company's 1400 model robot as an example:
Create a new folder in the [virtualSimulation\UnityApp\UnityRobot_Data\StreamingAssets\Mods] directory (manufacturer name) - [inexbot]
Create a new folder in the [inexbot] directory (robot model) - [1400]
Create a new folder in the [1400] directory (for storing 3D models, this file needs to be provided by the robot manufacturer) - [model]
Place the [config.json] file in the [1400] directory. This is a configuration file used to define the robot model structure. The program will automatically load the model, establish joint hierarchy, set rotation axes and end-effector tool points in the Unity scene based on this file.
File node introduction:
| Field Name | Type | Description | Example |
|---|---|---|---|
| robotName | string | Robot model | 1400 |
| modelPath | string | Model folder path (relative to Mods directory) | inexbot/1400/model |
| scale | float | Robot overall scaling factor, can be adjusted according to actual needs | 0.007 |
| defaultRotation | float | Root node X, Y, Z initial rotation angle (unit: degrees) | [-90, 0, 0] |
| joints | array | Definition of each joint | [ {...}, {...}, ... ] |
| endEffector | object | Define end-effector (end tool point) |
joints (Joint Definition)
The program will automatically set the pivot position as the rotation center.
The model will be instantiated under the _mesh child node of the pivot.
If parent is not specified, the joint is directly attached to the robot root node.
| Field Name | Type | Description | Example |
|---|---|---|---|
| name | string | Joint name, must be unique | "joint3" |
| parent | string | Parent joint name (empty means root node) | "joint2" |
| mesh | string | Model file name (must be in the modelPath folder) | "joint3.obj" |
| pivot | [x, y, z] | Joint rotation center offset relative to parent node, provided by robot manufacturer | [54, 0, 838] |
| axis | string | Rotation axis direction, options: "X", "Y", "Z". Can add "-" to control default initial rotation direction | "Y" |
| color | [r, g, b] (optional) | Model initial color, range 0~1, can be adjusted as needed | [1, 0.5, 0.5] |
| isLastRotJoint | bool (optional) | Whether to mark as the last rotation joint, used for loading posture (e.g., EndToolDown90 mode) |
endEffector (End-Effector Definition)
The end-effector is used to specify the position offset of the robot end tool (e.g., welding torch, suction cup, etc.).
The program will automatically create a virtual node VirtualEndEffector at this position to record the end position or draw trajectories.
| Field Name | Type | Description | Example |
|---|---|---|---|
| name | string | The joint name it is attached to (usually the last joint) | "joint6" |
| offset | [x, y, z] | Offset distance from the joint end to the tool point, provided by robot manufacturer | [600, 0, 862] |
- Place the [robot_config.json] file in the [virtualSimulation] directory.
File node introduction:
| Field Name | Type | Description | Example |
|---|---|---|---|
| robotName | string | Robot model path | inexbot/1400 |
| LoadMode | string | At zero position, axis 5 direction. EndToolDown90 or EndToolDown0, choose one. Must be consistent with the axis 5 direction setting in Settings/Robot Parameters/DH Parameters on the PC version | EndToolDown90 |
| RobotIndex | float | Switch robot |
- Open the PC, click the [Simulation] button, and wait for the simulation software to start.